Affiliate Disclaimer: We work to provide bolo ties and locate merchants who sell the products you are looking for. If you make a purchase from any of the merchants we endorse, we will earn a small commission at no additional cost to you. Thank you for your support!
How to Make a Bolo Tie
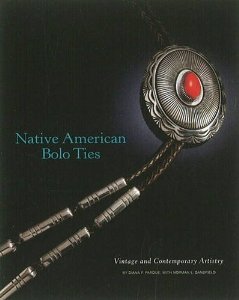
Bolo ties, also called bola ties, are a classic western accessory worn around the neck. It usually consists of a string of leather or plaited cord with ornamental metal clips on the ends, held by a decorative bolo tie brooch. Bolo brooches are frequently produced from silver and decorated with rocks or precious stones. Native American jewelry is known for their beautiful stones and silver accessories. In fact, you will find great bolo materials anywhere Native American craft shops are located, or in craft stores that sell Native American trinkets. The bolo tie can be worn with a brooch firm up against the collar or a bit-lower for an informal style. By staying within a few fundamental guidelines, you can create your very own bolo tie.How to Create your own Bolo Tie
-Materials
Scissors
Dry cloth
Damp cloth
Jewelry glue
File
Pliers
Ornamental stone, button, or pendant
Two bolo tips
Bolo slide
Braided leather or cord material
-Select a section of braided leather or cord. Preferably, the braided cord should be approximately forty inches long and about four millimeters thick. Put the piece around your neck, and do not forget to check that the ends set equably upon your chest. If you think the tie needs to be shorter, cut the piece to a comfortable length.
-Try the measurement of the bolo slide. Try one of the strings of the cord material or leather by putting it through one catch in the bolo slide. If the cord is too large, take your pliers and delicately expand the opening-of the slide. Take away the string and place it aside.
-Take a metal file and smooth or even out the borders of the bolo slide. This will stop the cord from becoming damaged or frayed. When you have finally leveled the bolo slide, clean it with a wet cloth, then wipe with a clean dry cloth. The damp cloth should be used to polish up the back part of the pendant, stone, or button you selected for your tie. Clean it again with the dry cloth. Glue the pendant, stone, or button to the bolo slide. Set it down and let it dry. Drying time will depend on the type of glue you used. Hot gun glue dries almost immediately but can be bulky if you do not use it correctly. Super glue may be the best choice, but be sure you are careful. Other glues may need up to four hours or over night to dry.
-Ease the braided cord through the two catches in the back of the bolo slide. Utilize your pliers to tighten the catches of the slide around the cord. The cord should still move but not too easily. It must be taut enough so that it will not slip down.
-Affix the bolo tips. Place a tiny amount of glue within the tops of the cord, and then firmly place the cord ends into the tips, using your pliers to thrust the cord inside the tips. Let the glue dry fully before wearing.
TIP: If you prefer not to use leather, try slim braided cords used for home decor. You will find tons of colors too!
Other Popular Articles
Bolo Ties Then and NowHow to Make a Bolo Tie
How to Tie a Bolo Slide Knot
How to Wear a Bolo Tie
The Origin of the Bolo Tie